Working with KHIKA Aggregators
Contents
Introduction
Data Aggregator is responsible for gathering the data from various end nodes, which can be servers, network equipment, storage devices, and sensors and so on. It receives the data in the protocol supported by the end device (for example Syslog, agent-based, opsec and so on), runs appropriate KHIKA Adaptor to convert the data to the KHIKA Data Format, encrypts it, compresses it and relays it back to KHIKA core engine for further processing and persistent storage.
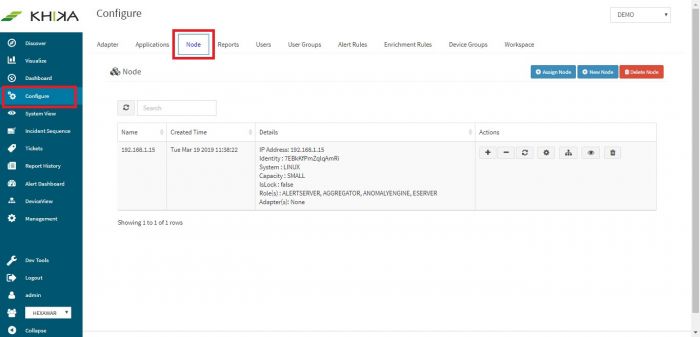
To access Data Aggregator tab, go to the main screen, click the left side menu bar. Click Configure and then click Node tab.
Node is a KHIKA VM which is assigned the role of an Aggregator or Data Collector.
Adding New Data Aggregator
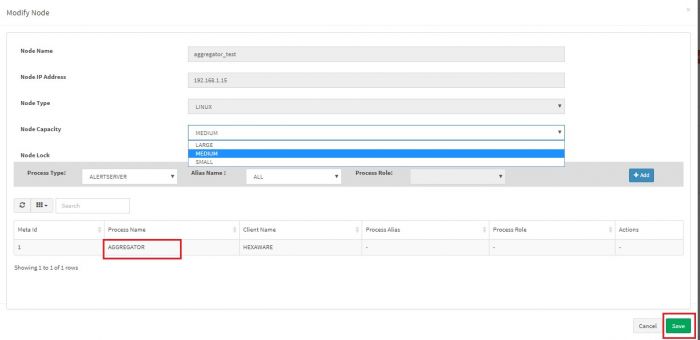
Click on “New Node” button. A pop up for the same appears.
The fields are shown in the table below :
| Header text | Header text |
|---|---|
| Node Name | Hostname of Aggregator VM |
| Node IP Address | IP address of aggregator VM |
| Node Type | Type of OS |
| Node Capacity | Dropdown to select between small, medium and large. This is the data collection capacity of the aggregator node. It depends on the incoming data size per day, number of devices sending their data to this aggregator node. |
| Process Type | This is a dropdown which allows to select processes running on this node, in addition to the “Aggregator” process.
Aggregator role is already selected for any node by default and can be seen in the table below. We need not select anything from this dropdown at the moment. |
| Alias name | Name given this Aggregator. Location or customer suffixes etc. Helpful in case of multiple nodes. |
| Process Role | |
| Node Lock | If this is checked, then Node settings cannot be changed / edited. To unlock it, contact KHIKA support. |
Fill in required details of the new node and click on Save button.
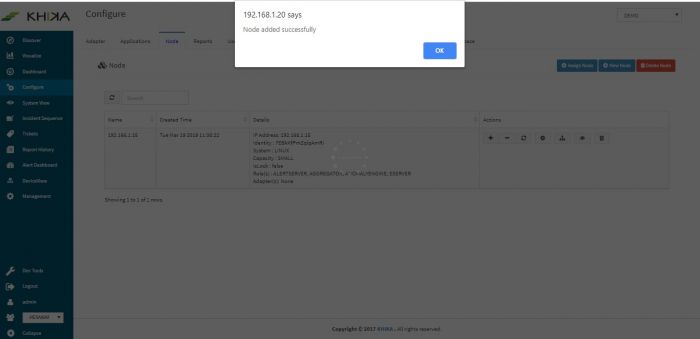
We get the following success message on creating the Aggregator Node.
Assigning Data Aggregator Node to Workspace
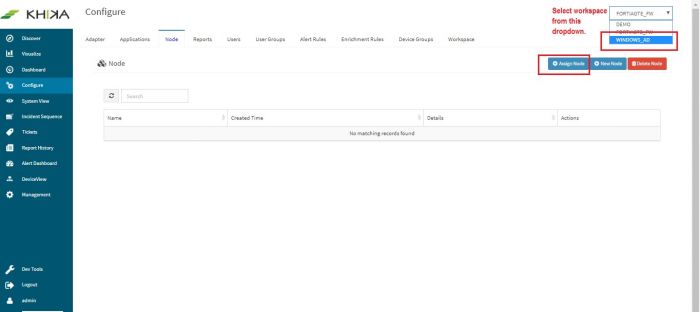
Click Configure and then click Node tab. To assign this Data Aggregator Node to a Workspace, select the workspace first from the workspace dropdown on top right. Then click on “Assign Node” button.
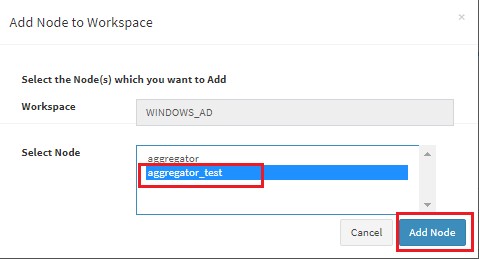
When you click on Assign Node button, following pop up appears.
The following table explains details of the fields:
| Fields | Description |
|---|---|
| Workspace | Name of the Workspace where you want to add the Data Aggregator. It is pre populated due to previous step as we already selected workspace. |
| Select Data Aggregator | Select the appropriate Data Aggregator from the drop-down menu. |
Lets select “aggregator_test” which we just created. Click on Save button. Following success message is displayed.
Deleting Data Aggregator Node
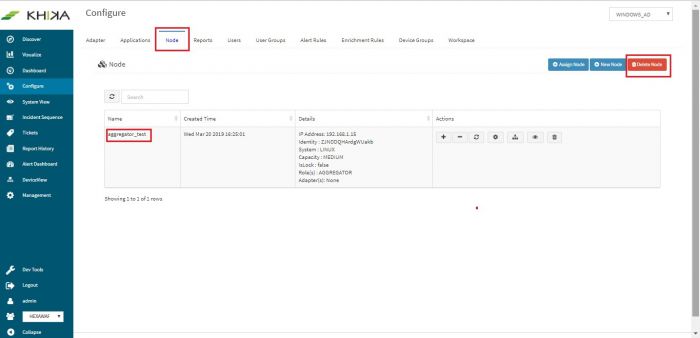
Click Configure and then click Node tab. We can see our “aggregator_test” node here. There might be multiple nodes too here. Data from multiple locations can be collected into the same workspace. Click on Delete node button, to delete it.
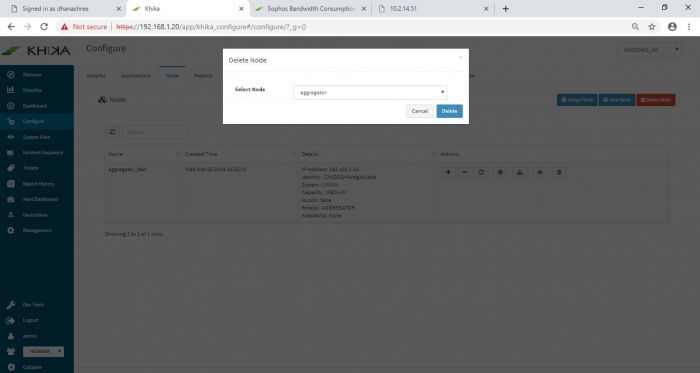
On clicking delete, a pop up asks user to select node to be deleted.
Select “aggregator_test” node from the dropdown and click on Delete button.
Deleting Data Aggregator from Workspace
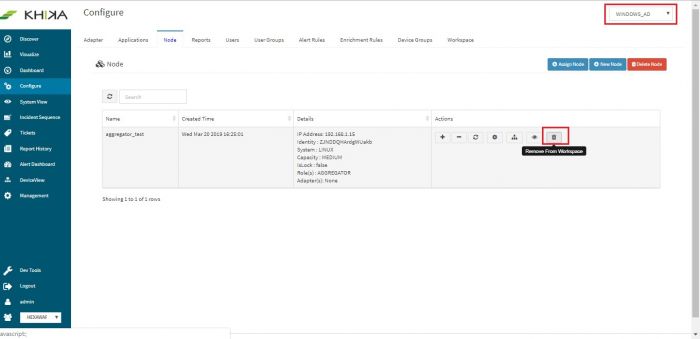
Click Configure and then click Node tab. To delete Data Aggregator from a certain workspace, select the workspace first from the workspace dropdown on top right of the screen. Then click on “Remove from Workspace” icon as shown – next to the desired node.
A confirmation pop up is displayed.
Click OK to confirm the deletion. The Data Aggregator is removed from Workspace, and the following confirmation message is displayed.
Assign Adapter to Data Aggregator
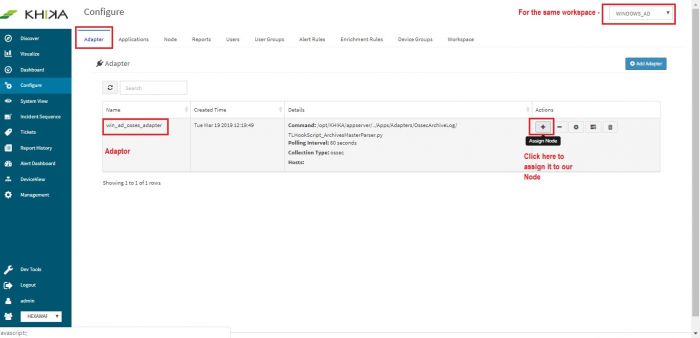
Before you could assign an Adapter to a Data Aggregator, it must be configured. Now in the same workspace selection (donot change the workspace at this point) change the tab and go to Adaptor tab. The preconfigured adaptor in this workspace can be seen. Click on “Assign node” + icon next to the desired adaptor.
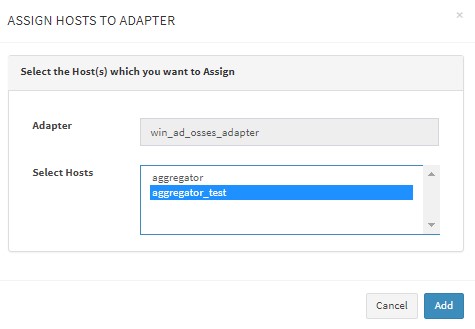
The following pop up appears. Adaptor name is pre entered. Select the node name as “aggregator_test” which we want to assign. Click on Add button.
Following confirmation message is displayed
Disabling Adapter to Data Aggregator
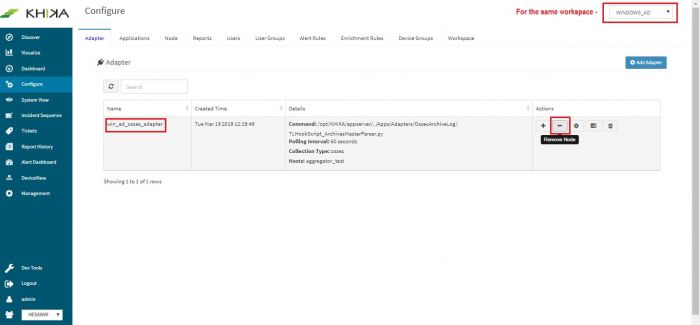
In configure, go to Adaptor tab and keep the same workspace selection. Click on “Remove Node” – icon to de allocate the adaptor to the Aggregator Node.
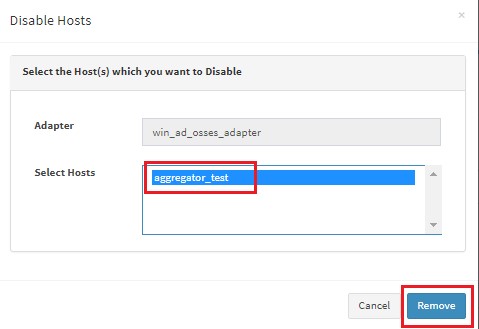
The following pop up appears.
Adaptor name is already populated as we have selected one above. Select the node from list of nodes. In our case it is “aggregator_test”
Click on Remove button.
Following confirmation message is displayed.
Refer the next section for exploring KHIKA Workspaces
