Getting Data into KHIKA
Contents
Introduction
On completing the configuration steps from previous sections, we are ready to take in data from various devices into KHIKA. Network devices like Firewalls, Routers/Switches, Web proxies etc use Syslog protocol most of the times to forward the data to the KHIKA Aggregator. Linux and Windows Servers use OSSEC Agents and it’s Integration with KHIKA to forward the data. Integrating a device into KHIKA can be done in either of the ways and involves some basic steps :
- Pointing the device to be monitored to KHIKA data collector. This can be in different ways (explained separately in sections below for syslog and ossec)
- On the KHIKA end, making the device entry at the adaptor level.
For this step, on the KHIKA end, there are two ways of configuring the adaptor.
- Install an Application – This is the most recommended method to configure. KHIKA ships some standard applications and it is explained in the next section how to install an Application. This step includes adaptor configuration and adaptors don’t have to be added separately if you have installed relevant application
By Installing an application, you not only get an adaptor configured but also the relevant reports, dashboards and real time critical correlation alerts for this data source are configured in just a single click – by just installing the application.
- Configure an adaptor in the right workspace, within the KHIKA data collector. This step is required only when you have not installed an application. For example, in case of any specific web application logs in your organisation etc.
Data Flow and Components in KHIKA
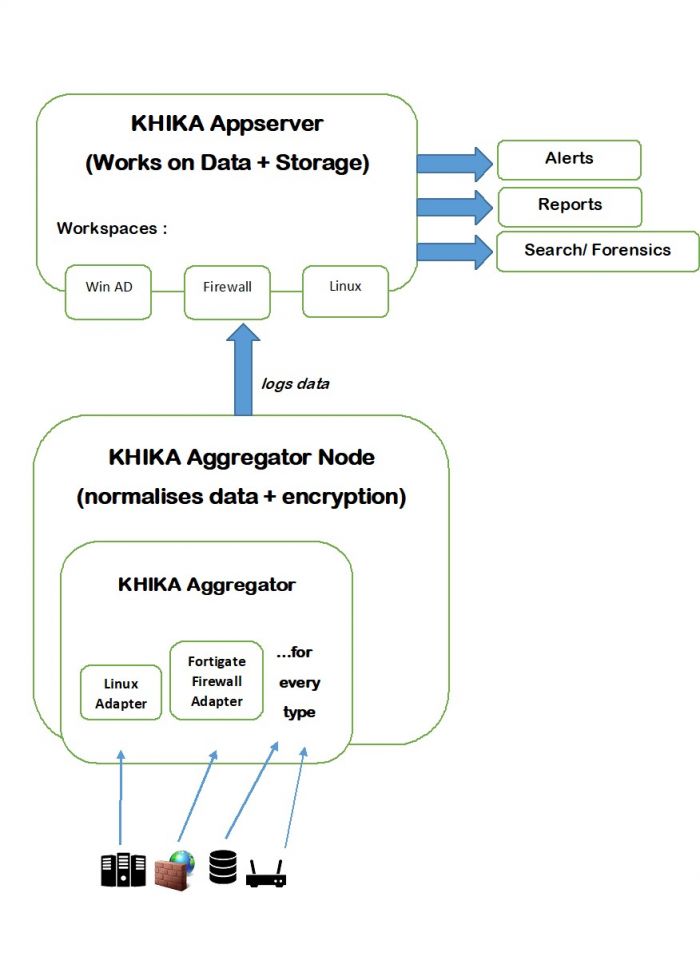
Data is sent from the end node or data source to KHIKA data collector or Aggregator node locally within its network. Inside the Aggregator there are Adaptors, one for each data type. Each Adaptor receives data, parses and normalises it to KHIKA proprietary data format. This is sent to KHIKA application server where it is acted upon by the correlation engine, indexer and storage. This data is stored in the workspace meant for this data type or access. KHIKA creates output in the form of Reports and Dashboards, real time Alerts and Search. Following is a diagram for the same.
There can be multiple aggregator nodes collecting data from different locations and transferring data to a single KHIKA App server.
When we install an Application, as explained in the following section, the relevant adaptor is configured inside the correct aggregator, and the relevant alerts and reports are configured. There are different inbuilt applications each for standard data sources.
When we do not install an application, we have to add the relevant adaptor for that data type into its aggregator node. This step has to be done while the correct workspace is selected.
Workspace contains an Aggregator and an Adaptor.
A KHIKA user can have access to one or more workspaces. Before creating workspaces, it is important to think which users will have access to which workspaces. Design your workspaces with a clear view and understanding of the data. As a thumb rule, you must create a separate workspace for the data that needs restricted access. (Example:- If you don’t want your IT team to have access to your HR data, create a separate workspace for your HR data). Create different “User Groups”, one per “Workspace”. While creating the Workspace, carefully assign it to an appropriate “User Group”. Create Users and assign them to one or more “user Group/s” depending on the access requirements.
KHIKA Apps
Go to the Load a KHIKA App section for more.
Importing an Application
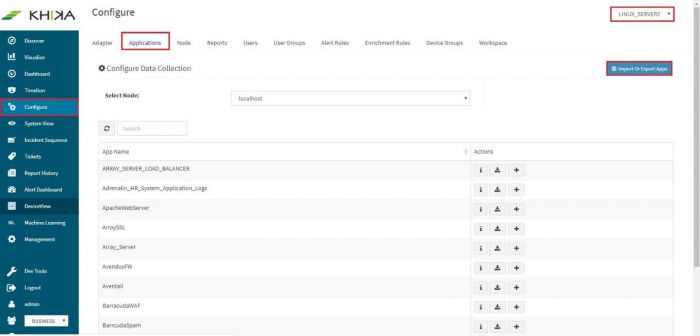
This feature is useful when there are newer KHIKA applications, which are not part of the current build. If there are data sources in your network for which there are newly developed KHIKA applications, KHIKA developers can export the KHIKA application (a .tar.gz file) Once you receive it, you can simply import it in a few easy steps. After importing, you can see it in the Applications list, install the imported application as explained in the section 3.1. Select Configure from the left panel. Select the appropriate workspace from the workspace dropdown on the top right. Go to the “Application” tab. Click on “Import Or Export Apps”
You will get a pop up as shown :
Click on “Choose App” button. This will open a browser windows to select the application’s exported file from your local machine, where you have saved it.
Select the file and click on “Upload” button. Click on Close button. We get a confirmation message in a pop up, after successful; upload and import of application.
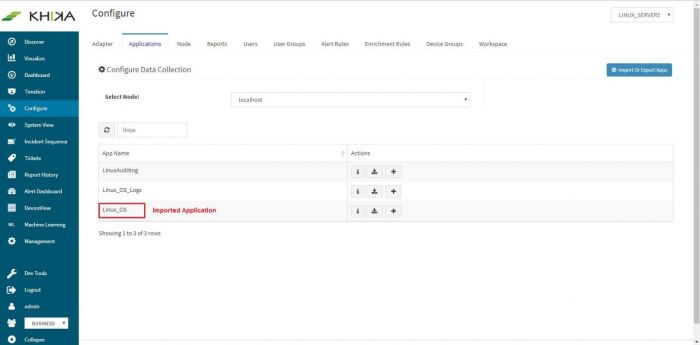
The newly imported application is now visible in the applications list. When we enter “linux” in search, now we see the additional linux application.
Exporting an Application
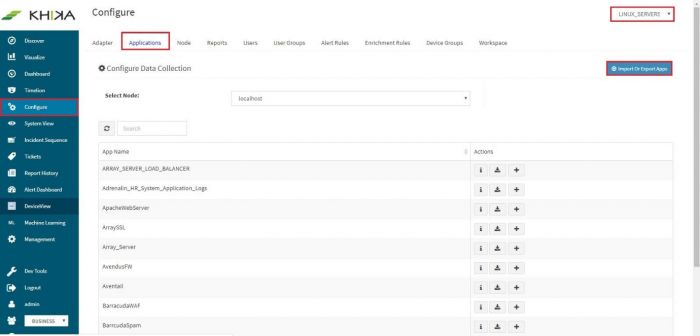
Select Configure from the left panel. Select the appropriate workspace from the workspace dropdown on the top right. Go to the “Application” tab. Click on “Import Or Export Apps”
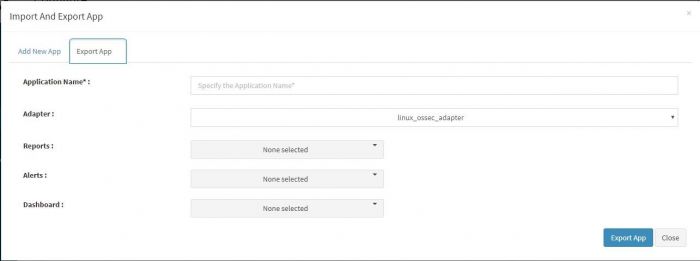
You will get a pop up as shown. Select “Export App” tab on the top.
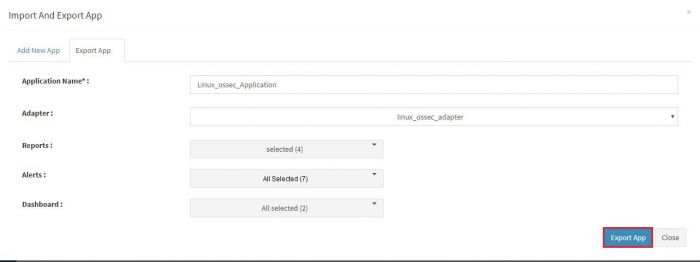
Another pop up appears where we can enter and select details to be exported in the application.
The fields in this pop up are explained in the table below.
table
Click on “Export App” button.
Confirmation message appears on successful export.
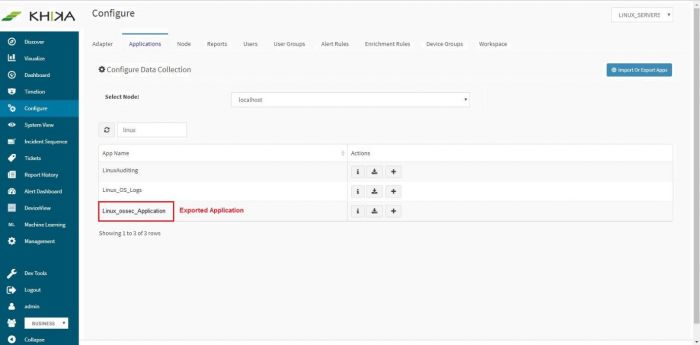
This application, ready to be exported is now visible in the applications list.
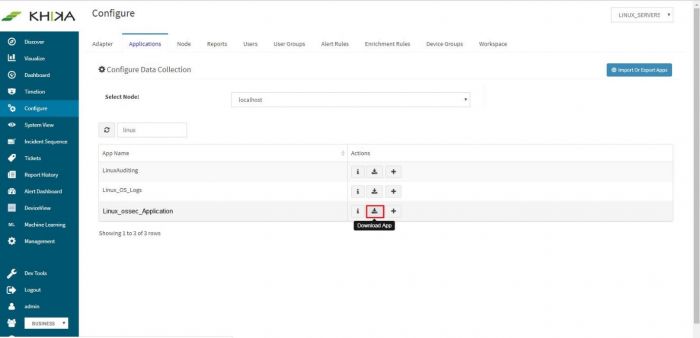
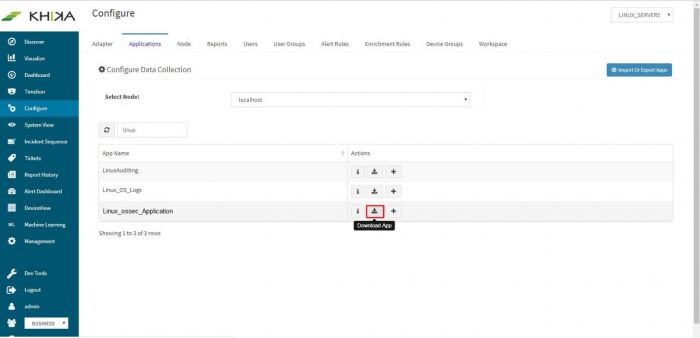
Click on the download icon next to this application,
Now from our example screenshot, this is downloaded as “Linux_ossec_Application.tar.gz” on your local machine.
Server monitoring in KHIKA using OSSEC
Monitoring in KHIKA using Syslog forwarding
Refer the next section for exploring your data in KHIKA
